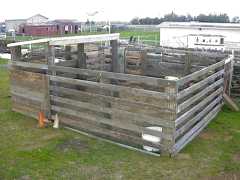
Building Yourself a
|
| |||
|
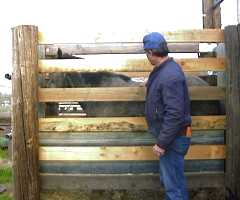
We take every "chuting" extremely seriously and move in a methodical and coordinated manner. The horse is confined in a very small space. We don't want the horse to panic and either hurt itself or one of us, nor do we want the horse to become terrified of the chute if in the future we need to run him back into it for some reason. We first let the horse get used to his new environment for at least a day before attempting to put him in the chute. We'll place his feed at the far end of the chute and tie the rear gate open so he can enter it, explore and eat in peace. We will try to introduce some mental focusing before putting the horse in the chute. For example, if the horse will take carrots by hand we'll condition the horse to a click-treat response using a clicker. This doesn't take long and we can use the clicker to refocus the horse and interrupt potential panic escalation when the horse is in the chute. When we send the horse into the chute, we'll organize ourselves in advance. Only necessary people will be near the chute and none will stand near the "head end" where it could disturb the horse before he is safely secured. We'll move the horse as quietly as possible, setting up a small blind in the pen if necessary to get the horse in the chute door. If we move the horse in quietly, he'll usually stop at the end and size up his situation which allows us to quietly but efficiently close the rear door and slide in the cane bolts to secure it. | ||||
|
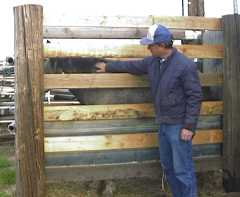
When reaching in to touch the horse, we start at the shoulder. If the horse seems to squirt forward, we move our hands slightly forward of the shoulder. If the horse bunches backwards, we move our hands slightly backwards. We don't tickle the horse, but rather press firmly, but not too hard, against the horse's skin until he stops twitching. Then we'll provide a click treat or two and make small movements along his withers area providing scratches (similar to another horse's grooming) and make TTeam touch circles. We're careful not to reach in too far. We try not to have more than a half of a forearm inside the chute so that if the horse overreacts, we won't get caught and get an arm broken or elbow dislocated. We will definitely not extend an elbow past the chute rails. Once we can handle the horse's withers and neck area, we'll get a small, very sturdy step ladder and approach from a slightly higher angle. We will also make contact from both sides. If the horse seems overly stressed or starts sweating, we'll stop at a good point, let him relax for about 15 minutes, then start over. When the horse can tolerate contact on his withers and neck from above (and this usually doesn't take too many minutes if done carefully and intuitively), we will try introducing the halter. If the horse avoids the halter by diving his nose to the ground, we're not going to try to reach in the side of the chute to halter him, but rather will introduce the halter "from the ground." We'll take the lead rope and fasten it to the buckle side of the halter. Then we will carefully pass the halter under the chute so that the poll strap extends out the other side. Someone on the far side of the chute will drop a string down the inside of the chute and tie the end of the string to the poll strap. Now the halter can be picked up (by means of the lead rope and string on opposite sides) and held against the horse's neck. This should at some point bring the horse's head up. |
Horse eating in the chute,
| |||
|
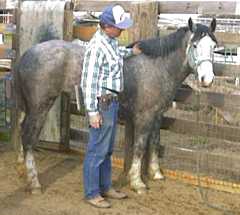
Haltering the horse this way takes very little time if done safely and correctly. Accordingly we try to observe several safety precautions.
We apply the same logic when using the chute to first get our hands on the horse prior to haltering or in mentally preparing a horse to load into a small straight load trailer. The end result has to be the horse accepting the confined space, human contact and being able to relax. Otherwise the chute is going to become a terror trap to be avoided at all costs.
Important Note!
Some of these sequences were photographed decades ago before we participated in a helmet safety study. The results of the study were impressively conclusive. Since 1998 we always wear approved helmets when training and handling horses.
Return to Part ThreePress "Back" to return to the page that brought you hereGo to Case Study SectionReturn to Training SectionReturn to Wild Horse MentorsReturn to KBR World of Wild Horses and BurrosGo To
| ||||