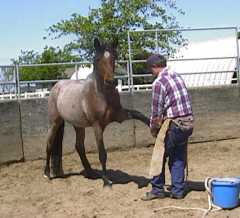
 Before attempting to trim a wild horse we work with the horse's feet to the point
that he will stand quietly for all four feet to be lifted forwards and backwards
while not being restrained. Depending on the horse we may tie him off to trim
him, he may need to be held by a handler or he may be at liberty in the round pen.
His behavior and willingness dictates our approach. We might even use our
Handling Chute
(shown on the right) to safely control the horse.
Before attempting to trim a wild horse we work with the horse's feet to the point
that he will stand quietly for all four feet to be lifted forwards and backwards
while not being restrained. Depending on the horse we may tie him off to trim
him, he may need to be held by a handler or he may be at liberty in the round pen.
His behavior and willingness dictates our approach. We might even use our
Handling Chute
(shown on the right) to safely control the horse.
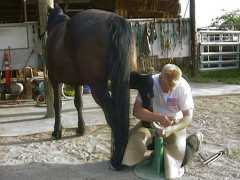
Getting trimmed shouldn't become something that the horse dreads. Patience, safety and the
horse's comfort should be your foremost concerns.
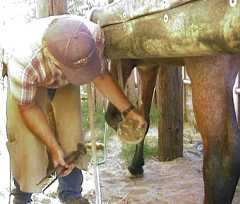
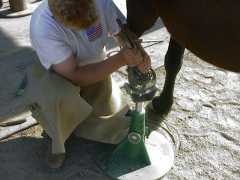
Note: The person trimming in this sequence is not a professional farrier. This is James Kicker, a recent wild horse
adopter whom we happened to photograph while trimming "Comstock," a large mustang who has granite hard feet and tends to
grow an overly long toe.
|
The first step in trimming a foot is to clean things up and see what you have. It should be picked clean of manure, dirt and other debris.
The old, tough dried up surface of the sensitive frog should be pared away.
Distortions and dried up flaps should be cut away so that the foot will be easy to clean between trims.
The heels of the frog should be trimmed to approximately the level of the hoof when it is
trimmed. (Final adjustments can be made after the trimming is done.)
Some frogs are pretty tough and we sometimes need to use the nippers to trim away the excess.
It doesn't come out as pretty this way but it is functional.
|
Cleaning up the frog
|
|
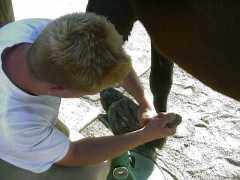
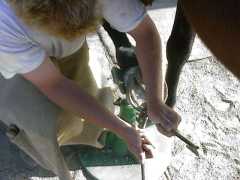
There will usually be irregularities in the sole and bars of the heel. Overgrown and peeling
materials need to be removed. We use either a hoof knife or the nippers depending on the
condition of the foot.
Sometimes we can hook onto a flap of sole with the curvature of the hoof knife or the nippers
and peel it like an orange. On other horses the excess sole may have already self-exfoliated so we will
just smooth off the protruding rough edges. With hard feet we often use two hands on the knife
to guide it properly and prevent accidental digging into the sole.
When using the nippers on the sole we try to maintain a flat approach so that we don't gouge
holes with the nippers.
Sometimes we have to work our way around the bars and other structures, nipping a little here and
nipping a little there in order to get a proper "bite."
|
Taking out overgrowth
Using the nippers on the sole
|
|
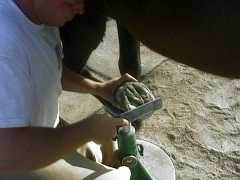
Once we have everything cleaned up we can get an idea as to the proper shape of the horse's
foot. The sole should be relatively uniform and look like the anatomy photo in Part 1.
At this point we want to trim the hoof wall level with the sole. Newcomers to this
should study the sole first and imagine where the level line runs through the heels
and in front of the toe callous. We recommend starting out conservatively at the heels.
You may find you will have to trim around the toe callous.
|
Leveling the shell
|
|
Many mustangs will have a very hard toe callous on the sole that protrudes just behind the tip of the
toe. It's often better for the novice to attack protruding surfaces on the sole
callous with a rasp rather than struggle trying to cut it.
We have found the easiest approach is to trim the hoof wall from around the toe callous to the
level that the rest of the hoof suggests is appropriate. This will often require the nipper
handles to be angled away as you go around the toe. This is OK.
Once you have a relatively level line you can rasp off the excess toe callous. If the callous
starts to look pink before you are done, leave it, let it dry out for a few days, then try to
rasp off the remaining excess.
|
Rasping down the toe callous
|
|
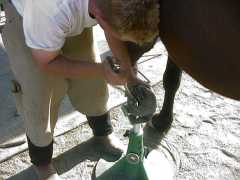
At this point you need to check your work. Your primary objective is to end up with a level
foot. This can be checked by holding the foot in both hands, placing your thumbs on the center
(widest part) of the heel bulbs and sighting down the sole plane of the hoof.
Looking along the edge of the hoof you can see any points that look long. Using your
thumbs as a reference you can see if the hoof is generally level. In the image on the
right, we can see that the hoof is still slightly long on the left side and needs to be
dressed off a little more with the rasp.
The long spots can be cleaned up with the nippers, rasp, hoof knife or a combination of
the three. We just keep making adjustments until the hoof looks level when we sight down on it.
Note: On some feet we may end up with a slight concavature on each
side of the hoof wall just ahead of the heels. This is completely normal for some
horses. This is the area where the hoof wall isn't required to support the horse's weight
and it dissipates stress. In fact cracks and chips in this area will often appear in healthy feet
when they get long and for the most part are only cosmetic blemishes.
|
Checking for a level foot
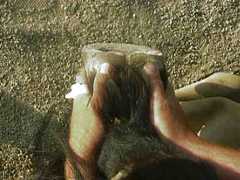
Touching up the long spots
|
|
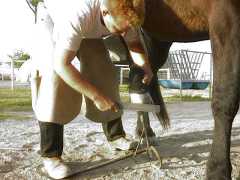
Once the hoof is level it should be dressed off with the rasp. With the hoof on the stand,
the coarse side of the rasp can be used to take off flares and those uneven edges left by the nippers.
By passing the rasp around the outside bottom edge of the hoof wall, protruding points can be filed
back evenly to meet your desired hoof profile.
As your work progresses you should be able to visualize what a symmetrical and balanced foot should
look like. With the rasp you can take off what doesn't look like it belongs there. You can usually take
off a little more underneath the toe with the rasp if the toe looks too long.
|
Rasping off a flare

|
|
Once the hoof is decently shaped the edge of the hoof wall can be rounded off nicely
using horizontal strokes with the fine side of the rasp. The finished edge of the hoof wall should have a
smooth, rounded bevel. This bevel will help prevent chips and cracks as the horse strikes rocks and should
give the sole some ability to expand and self-exfoliate.
|
Final touch-ups on the hoof walls
|
|
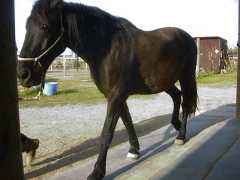
You should end up with a nice overall appearance. When done you should again walk the
horse to make sure he is striking the ground correctly with all four feet.
|
A nice visual appearance

|
Walking the horse
|
Press Back to return to the page which brought you here
KBR Horse Health Information, © 1997 Lamm's Kickin' Back
Ranch and Willis & Sharon Lamm. All rights reserved. Duplication of any of this material for
commercial use is prohibited without express written permission. This prohibition is
not intended to extend to personal non-commercial use, including sharing with others for
safety and learning purposes, provided this copyright notice is attached.
Email us to submit comments or request reproduction
permission.
|